Sunday, 24 April 2011

Easter Nest Cupcakes


photo(2)

I wanted to make Easter cupcakes. My first thought was Simnel cupcakes. I was thinking a lightly spiced, fruited cupcakes with lots of currants and candied peel, topped with almond flavour buttercream and a ball of glazed marzipan. Actually they sound pretty good! But I decided that, being v non religious, Easter is about chocolate! And the idea of nests came into my head. They’re ultra simple and tasty. Topped with mini eggs, they become v Easter like. Vanilla cupcakes so its not all chocolate and a little chocolate buttercream to help the nests stick. And once I got the ideas into my head, that was it! I had to make them!

Weirdly, I don’t have a good vanilla cupcake recipe yet so a quick google furnished me with the Magnolia Bakery one.

1 ½ Cups Self Rising Flour
1 ¼ Cups All-Purpose Flour
1 Cup (2 sticks) Unsalted Butter, softened
2 Cups Sugar
4 Large Eggs, at room temperature
1 Cup Milk
1 tsp Vanilla Extract

067

1. Preheat oven to 350˚F.
2. Line two 12-cup muffin tins with cupcake papers.
3..In a large bowl, on the medium speed of an electric mixer, cream the butter until smooth. 4. Add the sugar gradually and beat until fluffy, about 3 minutes. Add the eggs, one at a time, beating well after each addition. Add the dry ingredients in 3 parts, alternating with the milk and vanilla. With each addition, beat until the ingredients are incorporated but do not overbeat.

068

5. Using a rubber spatula, scrape down the batter into the cupcake liners, filling them about ¾ full. Bake for 20-25 minutes, or until a cake tester inserted into the center of the cupcake comes out clean.

069

6. Cool the cupcakes in the tins for 15 minutes. Remove from the tins and cool completely on a wire rack before icing.

073

I followed the recipe to the letter. Easy. I’m told the cakes tasted quite eggy. I felt they were slightly eggy but not too much so. The whole eggy thing makes me fairly curious so I’ll probably try devote some time soon to testing various vanilla cupcakes to see if this is a Magnolia Bakery thing or a vanilla cupcake thing.

For the nests, I melted some chocolate. I have no exact measurements for the nests but I melted a 200g of dairy milk, minus one square that was eaten, purely for testing reasons! I poured some cornflakes into a bowl. I have no idea of how many! I just poured in what felt like a good amount! Here they are waiting for their chocolatey doom…

070

And here they are after meeting it…

071

So, probably too many cornflakes for the chocolate! But I pressed on. The original idea was to hand mold nests and leave them to dry on parchment paper but that proved impossible! So I spooned them into cupcake cases and put them in the fridge to set.072

The teeny weeny eggs are from ASDA and are so freaking cute! When the nests were set, I made a bog standard chocolate buttercream, again no measurements, just butter, cocoa, sugar and a splash of milk…

074

I topped the cupcakes with a small amount of buttercream.

075

then removed the paper cases from the nests and rested them on top, squishing them down a little to make sure they’re stuck. Make sure they go back in the frost before you eat them as it helped the nests to harden up again and makes them easier to eat cos everything is stuck tight!

photo

Apart from the eggy cakes issue, these were delish and I was really pleased with the way they turned out. V Eastery!

Happy Easter!

L x

Caramel Apple Cupcakes


062

These Caramel Apple Cupcakes have been in my recipe book for a while but the caramel calls for a certain temperature to be reached and so you need a candy thermometer. Finally I got round to getting one! So these were the first to be undertaken. I’m not a huge fan of apples and generally people are pretty shocked when I eat one. But these weren’t really appley and the creamy sweet cream cheese frosting and almost tooth achingly sweet caramel meant they were sweet rather than appley. I shan’t type the whole recipe out but I did make a few changes so I’ll talk through those, both good and bad!

So, let’s start with the cupcakes!

056

The original recipe also calls for cinnamon and ginger, of which I like neither! So both were left out. I think that if you like them and add them, it could only improve upon on the cupcakes, giving them something to reflect upon the sweetness. The recipe calls for the apples to be cored and roasted before being skinned, mushed (technical term there!) down and added to the cake batter. I’m impatient. Really impatient and I was desperate to get these done and finished so I skipped the roasting and just peeled, chopped and cooked the apples in a pan. A kinda homemade apple sauce really. Just chuck them in a pan with a splash of water and cook till the apples start to disintegrate, at which point I helped them along with a potato masher, then cook a little longer till they no longer hold their shape, cool, then add to the batter. Doing this took 20 mins off the recipe time but next time I would roast them cos I think that’d intensify the apple flavour. Other than that, I followed the recipe exactly, although I got 12 rather than 9 cupcakes.

Once baked, the cupcakes are filled with a cream cheese frosting using the cone method of filling. Cut a cone from the cupcake, cutting the cakey bit from the cone, leaving you with a thin top…

057

Then dollop in the frosting, as much as you can get in the cone…

058

Then just replace the top. Filled cupcakes!

059

Like nothing ever happened!

For the caramel, I made a mistake and didn’t read the instructions correctly, that's why I get for reading the recipe off my iPhone! So rather than only adding the condensed milk, syrup, butter and sugar (you see why it’s so tooth achingly sweet!) to start with, I added everything! I figured that I’d push on and see what happened. I figured I could start again later and I was curious to see if it would totally mess it up.

060

So bring to the boil, stirring (this is important, no need to ruin a pan!) then bring to a temperature of 248 degrees. Mine didn’t quite reach this temperature and I suppose it was cos I got bored of watching the slowly itching up mercury! So I gave in, took it off the heat and poured it into the bowl, stirred and it was perfect! One time when my impatience paid off! It didn’t pay off when I went straight to trying to get hot sticky caramel onto the cupcakes. The fist couple of cupcakes were v messy but as the caramel cooled and became easier to work with they became less messy. I didn’t put them into the fridge after each was coated but I should have. I was picking caramel off my worksurface for aaaaages! But they were tasty.

066

Better the day made, the second day they tasted somewhat stale. The caramel remained sticky though. I’m informed these are some of my best cupcakes! The caramel has been requested to go over ice cream twice already! Definitely worth the effort, especially if you have more patience than me!

L x

Saturday, 23 April 2011

Grasshopper Cupcakes

042

Grasshopper pie is an American dessert that is essentially mint mousse in a cookie base. A minty pie! I tend not to be a huge fan of mint and chocolate together, Aeros are so not my thing, but the idea of making mousse and piling it on top of a cupcake was too hard to resist! And it ended up giving me THE best chocolate cupcake recipe EVER! De-freaking-licious!

Grasshopper Pie Cupcakes

Makes 12 (I halved and got 6)

Mint Mousse:
14 large marshmallows (I used 140 tiny marshmallows!)
1/4 cup whole milk
2 tablespoons Crème de Menthe (I had none! So I used a tsp. of mint extract and the same of green food colouring)
1 cup heavy whipping cream

Chocolate Ganache:
2 oz. good quality 70% chocolate – Lindt works great, cheaper brands sink
4 tablespoons heavy cream
1 tbsp. powdered sugar

Chocolate Cupcakes:
3 oz. 70% chocolate, chopped or 3 oz. high quality mint flavored chocolate (I just used normal dark cooking chocolate! The ASDA extra special is my go to! Its 76% cocoa solids and insanely cheap for that %!)
5 tablespoons (30 grams) cocoa (natural or Dutch)
3/4 cup hot coffee
3/4 cup (118 grams) bread flour
3/4 cup (144 grams) granulated sugar
1/2 tsp. salt
1/2 tsp. baking soda
6 tablespoons vegetable oil
2 large eggs, room temperature
2 tsp. vinegar
3/4 tsp. vanilla extract plus ½ teaspoon peppermint (omit if using mint chocolate)
(I didn’t add the mint extract. Like I said, me and mint chocolate do not get on! So I omitted it)

1. Preheat oven to 350 degrees F. Have ready two muffin pans with 12 compartments each. Line with paper liners so that you have 12 for the mousse and 12 for the cupcakes.

2. Crème de Menthe Mousse
Combine marshmallows and milk in a large microwave-safe mixing bowl and microwave on high for 30 seconds. Stir well. Repeat if necessary, stirring every 10 seconds until the marshmallows are melted and smooth. Let cool. (No microwave! But it worked just as well over a double boiler) Stir in the Crème de Menthe (Mint extract and food colouring in my case). Whip the cream and fold all of the whipped cream into the cooled marshmallow mixture. Divide mixture evenly among 12 paper lined cupcake tins and put the pan in the refrigerator while you proceed with the recipe. Mousse needs about 2 hours to thicken.
(I found my mousse took a lot longer than 2 hours to thicken. I left it for maybe 4 and then I kinda figured it was as set as it was gonna get. So I went ahead and finished the cupcakes. Next time I might make it the day before and leave it overnight cos mine was def not the same texture as the original seemed to be)

030

031

032

033

3. Ganache Filling:
Place chocolate, cream, and confectioners’ sugar in small microwave-safe bowl. Heat on high power for 10 to 20 seconds and stir. Repeat, being careful not to over-heat the chocolate. Stir or whisk until smooth; transfer to refrigerator for 15-20 minutes or until slightly thickened.
(Again, no microwave, so I heated the cream and sugar to just below boiling point, as soon as the first bubble round the edge appears take it off the heat, and poured it over the chocolate, left it for 30 seconds then stirred till melted and smooth. I actually felt that the ganache added v little to the cupcakes added as it was, just to the tops. In future I’d probably fill the cupcakes after baking with it and maybe flavour it mint too!)

4. Cupcakes:
Place chocolate and cocoa in a mixing bowl and pour the very hot coffee over. Whisk until smooth then cool in refrigerator for about 15 minutes.
(I didn’t chill it, I just left it for 5 minutes then continued. I didn’t think it made too much of a difference)

In another bowl, mix the flour, sugar, salt and baking soda together, set aside.

Whisk oil, eggs, vinegar, vanilla and peppermint extract into the cooled chocolate mixture until smooth, then stir in the flour mixture. Divide batter between 12 baking cups and place 1 rounded spoon of ganache on top of each cupcake. Bake 17-19 minutes, until cupcakes are set and just firm to the touch. Let cool completely.

034

035

036

037

041

5. When ready to serve, remove mint mousse cups from refrigerator. Carefully remove wrapper from one mousse cup and invert on top of a chocolate cupcake. Using a warm butter knife (I run the knife under a little hot water), gently smooth the sides of the mousse to work out any cupcake liner ridges.

Repeat with all mousse cupcakes and cupcakes. To serve, top with shaved chocolate or chocolate syrup.

The cupcake recipe is divine! Dense but not too dense, moist and chocalately. Its a keeper! The mint mousse, not so much. It had a, well, unique texture and a weirdly toothpaste taste and mouth feel. I’ve baked these cupcakes since and followed the method the same, substituting plain flour for bread flour and it was still perfect so bread flour isn’t really a must for these. If you really like mint chocolate, then you’ll probably love these but for me, the mint aspect was slightly disappointing.

044


L x

Friday, 22 April 2011

Swedish Princess Cake


025

So, my main experience previously of this cake was the Morrisons Supermarket version! I had no idea of its swedishness, just it’s deliciousness! But whilst doing my usual baking blog browsing I came across the recipe for Princess Cake and recognised it. So I wrote it down and stored it in the back of my brain for a day when I fancied wasting a day in the kitchen. Eventually I was asked to make it and so I did! Its not particularly complicated, its more a lot of effort. Each step individually is easy enough but combining them all is the long part.

The original, super long, recipe is here and I shan’t waste oodles of time writing it out but rather run through the steps and add my opinion on each. Firstly, pastry cream! I suppose pastry cream is just thick custard. Easy enough to do but does need to be given plenty of time to chill. Hence the fact that its first to be made.

008 


009

Its basically a heat milk, whisk eggs and sugar, add slowly, heat till thick kinda method. Keep it moving and remove from the heat as soon as it starts to thicken and all should be well. Mine was way too thick after chilling and really I should have heated it again with some milk in order to try and thin it down somewhat. I didn’t and I ended up almost slicing it onto the cake. Tasty but texturally wrong.

Next cake! A genoise cake to be precise. The big thing with this cake is the fact that you add no leavening agent, such as baking powder, to help it rise. Its rising depends purely on your own elbow grease and careful folding. I tried! But I think I was too heavy handed with the folding and I knocked most of the air out and ended up with a cake that was really heavy and really didn’t rise too much at all. I was disappointed but we learn from mistakes and I’ll def keep trying with it!

010

012

Marzipan! The original recipe gave instructions to make the marzipan by hand and I have made marzipan numerous times in the past, its really simple! Just chick a few bits together, mix, chill and that's it! But seeing as I was undertaking so many other steps I figured that brought marzipan wouldn’t be a huge failure. I still coloured it green, just with liquid supermarket colouring. Just added some to a well in the marzipan and knead well. Do it on a surface that will be washable and one that you won’t be too unhappy with if it ends up green! Lots of icing sugar too, other marzipan hands will be your destiny! Once coloured, roll.

016

Then, finally, its time to assemble. Cake layer first, topped with a thin layer of raspberry jam, just from a jar and a thin layer of the enormous (710ml!) amount of cream that you’ve whipped with sugar and vanilla.

017

Then another cake layer, topped with pastry cream. Sliced pastry cream! Then the final cake layer. Before mounding the cream on the top. You need to make it into a dome. Then chill for around 10 minutes.

019

020

022

Once chilled, you just need to drape the marzipan over the cake. The chilling will help the cream not just squish out and provided you make the marzipan thin enough, you won’t need to worry. I find a few drapey, overlapping bits nice but you might not. You need to be carefully not to stretch the marzipan too much or you end up with holes. These are easily fixed with a patch of leftover marzipan though. The cake is so massive that any tiny mistakes are usually covered as people gasp at the size of the bloody thing! I cut some, v rough, leaves out of some leftover marzipan and I stuck then to the top with a drop of water. You don’t need to, I was just being poncey!

024

029

The cake was by no means perfect but I was really pleased with it. It looks impressive and serves like a million people! And it tasted even better after a night in the fridge!

L x

Thursday, 31 March 2011

Rocky Road Cupcakes


024

Rocky Road is a mixture of delicious things that I enjoy! So those cupcakes are perfect! The recipe intrigued me! Devil’s food cake and a unique condensed milk frosting containing marshmallows, more chocolate and almonds! Total delicious chocolate overload! The original recipe made 24 so I quartered it to make my usual amount of 6 cuppycakes! I pretty much followed the exact recipe from there except my lack of buttermilk and my inability to find it at my local shops (a fact I was none too surprised about!) so with a bit of research I found a recipe that states a tablespoon of acid added to a cup of milk made a buttermilk substitute. I used some white wine vinegar I had hanging about and left it for 5-10 minutes. I didn’t notice a huge change, I think I was expecting solid milk or something! But the recipe worked just fine so that's a trick to keep in the back of my mind!

022

The cakes were easy to whip together and the batter was thick and delicious!

023

So, scooped, baked and cooled. Frosting time! I’m usually rubbish at different frostings! Anything other than buttercream I mean! My only attempt at Swiss Meringue Buttercream was a nightmare and I ended up with a soupy mess that was no good for anything except the bin! So I was a bit concerned but actually this frosting was easy! And came together super easy with not much whisking involved! I think that it was essentially a fudge and the texture when chilled kinda confirmed that to me. But mixed with all the extras, it was gorgeous and I really struggled to save some in the bowl for the cakes! Could’ve eaten the lot! Easily! But I managed and on the cakes it went. The cakes were moist and soft and sooo good! Easily the best cupcake I’ve made in a while! And the frosting was tasty and surprisingly easy!

026

L x                                                                  

Chocolate Bread Pudding Cupcakes with toasted walnuts, homemade toffee and whipped cream.

017
So, I’ve become kinda lax about posting stuff on here. Who knew it’d take me so few posts! But here I am again! I baked these a long long time ago! But they were goooooood! That many o’s good! They were essentially just mini chocolate bread and puddings, but who doesn’t love anything that comes mini sized and in cupcake cases?!
The original recipe is here and I shan’t bother rewriting the whole recipe cos it’s fairly long! Which put me off somewhat to start with and I did, at first, dismiss it as too long winded and complicated. The thought of homemade toffee freaked me out and I did fear that me + boiling sugar = blackened ruined pan. But after a read through and a drool at the delicious looking photos, I figured what the hey, I’d risk it! And boy, was I glad I did!
The recipe makes 27. So I quartered it to supposedly give 6.75 cupcakes! I actually ended up with 8 but I was glad of that cos I got to eat more! The inaccuracy may have been down to me fiddling with the recipe and trying to quarter things and having to round up/down to get a measureable amount. Anyway… ingredients!
004 
And onto the toffee… I decided that rather than panic about boiling sugar I would just stay calm, follow the recipe and if a pan got ruined then so be it! I will not be scared of molten sugar! So cream, golden syrup and sugar in a pan, basically boil until nutty brown and dissolved. The recipe stated 20 mins. Mine took maybe 5. Maybe I had the heat too high, I dunno. But it worked! Poured onto a heavily greased and papered baking sheet and left to cool for a couple of hours and it was perfect yummy crunchy toffee!
003
Notice the heavy greasing! I wasn’t letting that baby stick! Next… yummy chocolate custard! Actually this bit is pretty straight forward, the hardest thing is all the waiting! I did want to just drink the finished custard. It looked so deliciously chocolaty!
009
Yum! So that goes over the chopped brioche loaf already in the cupcake cases. The recipe states that the loaf cubes go in the custard then are scooped into the cases but the blurb above states that this is stupidly hard and suggests the method I followed which is cubes in the cases, custard in a jug and poured over then left to soak. I did forget to mix the broken up toffee and toasted walnuts in with the custard to allow them to mix in with the pudding but I sprinkled them on top and while I could see that inside the pudding would be better, it def still worked!
010
Resting puddings! So they get baked till the custard is set and the tops are brown and crispy on the edges. After cooling, they get topped with whipped cream that I sweetened with icing sugar and vanilla and the remaining broken up toffee and toasted walnuts.
016
And there we have it! Yummy yummy chocolate bread puddings that I’m dying to make again and I didn’t ruin a single pan! Score!
L x


Wednesday, 9 March 2011

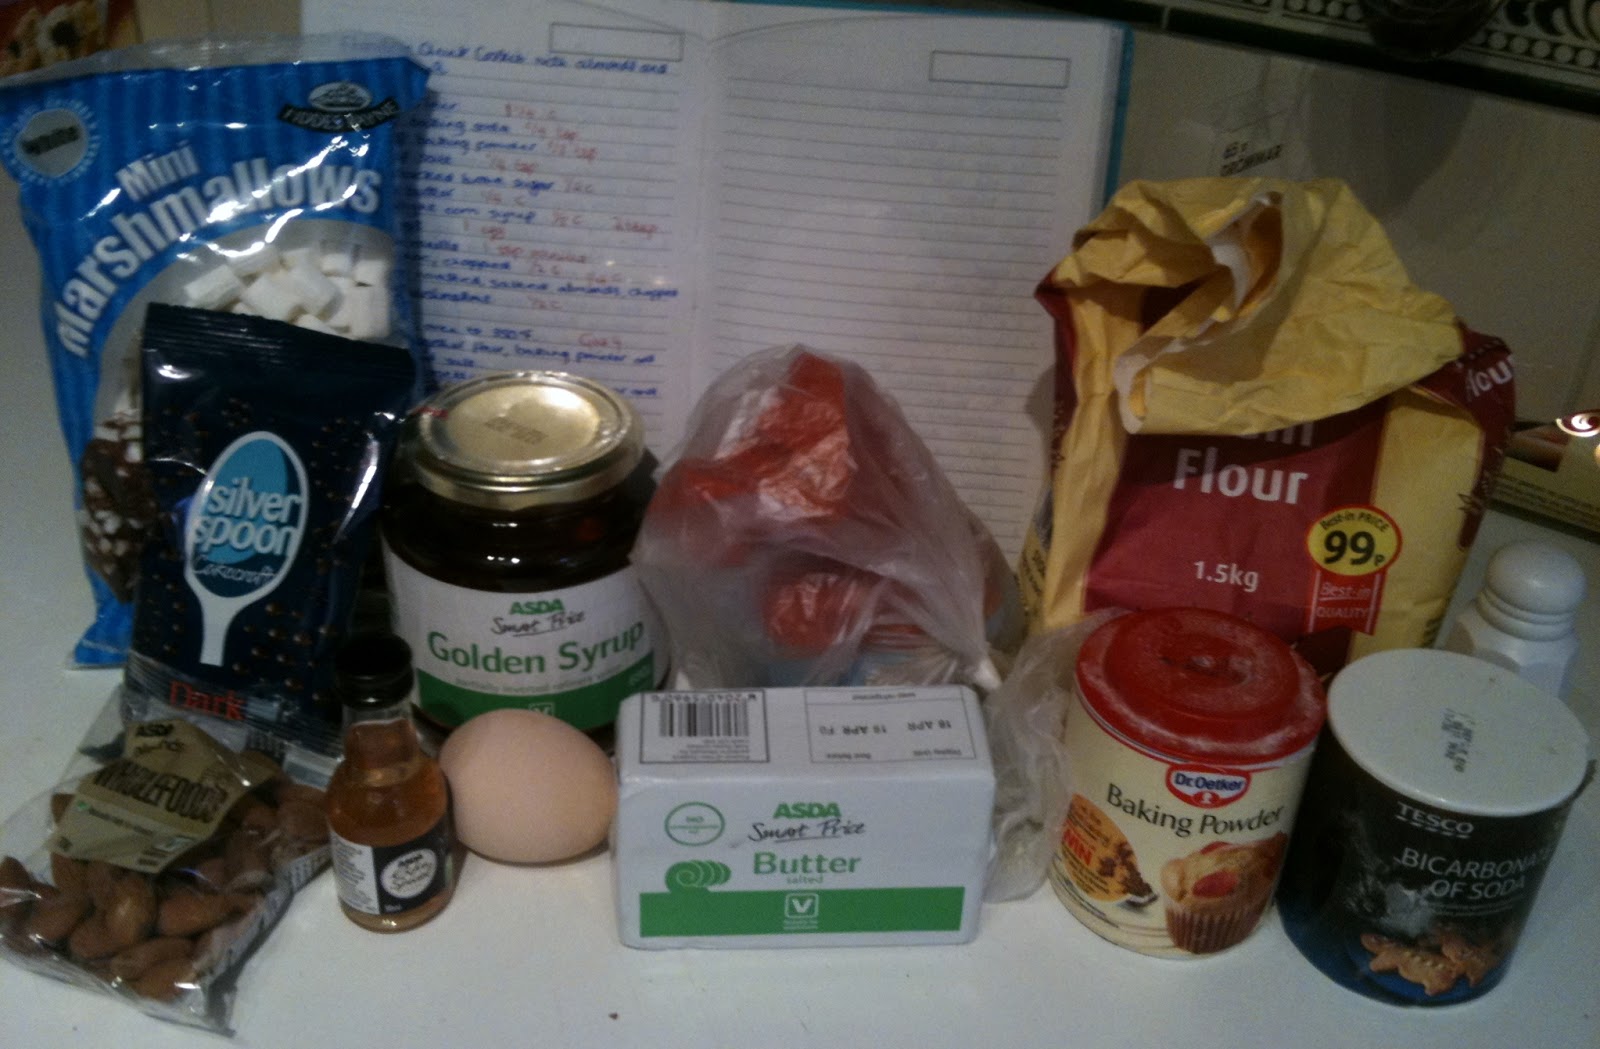
Chocolate Chunk Cookies With Almonds And Marshmallows

Cookies are my arch nemesis! I've never managed to bake a cookie I was happy with. Too dry, too wet, too gross! But I decided to swallow my cookie fears and so i walked into the (brand spanking new) kitchen with a recipe and a small amount of hope in my heart! And it was not misplaced! These cookies are yummy! Maybe I overcooked them a tad but otherwise, delicious! The original recipe is from here, my notes in blue!

Chewy Chocolate Chunk Cookies with Salty Almonds and Gooey Marshmallows 
2 1/2 cups flour (1 1/4 c)
1/2 tsp baking soda (1/4 tsp)
1/4 tsp baking powder (1/8 tsp)
1/2 tsp salt (1/4 tsp)
1 cup packed brown sugar (1/2 c)
1/2 cup butter (1/4 c)
1/4 cup light corn syrup (1/8 c or 2 tbsp, much easier to measure, golden syrup which is the closest thing to light corn syrup available in the UK!)
2 eggs (1)
2 tsp vanilla (1 tsp)
1 cup chocolate, chopped (1/2 c chocolate chips)
1/2 cup salted, roasted almonds, chopped (1/4 almonds, apparently salted, roasted almonds are impossible to find! So I toasted and salted my own!)
1 cup marshmallows (1/2 c of yummy yummy marshmallows!)
 

1. Preheat oven to 350 degrees. In a bowl, whisk together flour, baking soda, baking powder and salt. 
2. In a large bowl, beat together sugar, butter and corn syrup (golden syrup!) on medium speed of an electric mixture until light and fluffy. 
      
   Beat in eggs and vanilla. Reduce speed to low and beat in flour mixture.


   Fold in chocolate chunks (chips), chopped almonds and marshmallows.
 
3. Drop by tablespoons onto baking sheets. (I found that the cookie dough was firm enough to roll into balls) 
  Bake 10 minutes, just until no longer shiny. Let cool for 2 minutes on pans before transferring to wire racks. Store in an airtight container. 
There they are in all their glory! They tasted good! Maybe not quite sweet enough and the texture was a bit off but i figure thats just an excuse to keep baking cookies!
A few notes on various things, the best way to measure golden syrup, i've found, is to heat the measuring spoon on the gas flame of the hob (or in a glass of hot water), cuts through the syrup like butter! I got 12 cookies out of the halved recipe but i could have got a few more if I hadn't eaten so much cookie dough! Mmm cookie dough!


L x